ProFundCom Product & Service Notification 28th June 2025
As a user of the ProFundCom platform, we want to notify you that it has undergone some changes. We will send these notifications every time the platform is updated.
Event Manager Updates Impact: Medium Sections: Event Manager Description:
Ticket Types
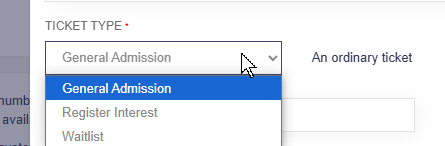
New types of ticket have been added, ‘Waitlist’ and ‘Register Interest’, and the existing default ticket has been named ‘General Admission’.
The type must be chosen when a ticket is created – the default is ‘General Admission’. The type mostly affects how an attendee’s status changes when they register.
General Admission – The standard ticket, it behaves exactly how tickets worked previously. If someone registers a ‘General Admission’ ticket, their status will be set to ‘Registered’.
Register Interest – If someone registers this ticket type, their status will change to ‘Registered Interest’. It can be a useful way of gathering an initial overbooked set of interested attendees which can then be curated as necessary, and the final list can have their ticket updated to a General Admission ticket using the new mass-update tools (detailed later).
Waitlist – The waitlist ticket has special behaviour – if created and enabled, it will only appear on the event page if all other ticket types are unavailable. This can be used if you have a limited number of places at an event – anyone wanting to register after the event has sold out can register a Waitlist ticket, and if any places become available between then and the Event start then admins can choose people with the ‘waitlist’ status to update to a General Admission ticket.
Additionally, there is now an option to hide a ticket when it’s unavailable, as opposed to the system just displaying a ‘this ticket is no longer available’ message.
Example use-cases
An event with an initial Register Interest ticket, from which a curated list of approved attendees is chosen.
Create a Register Interest ticket and make it available. Optionally add an ‘end sale on’ date to the ticket so it automatically prevents registration after a certain date.
Import attendees and sent invites
Attendees register their interest, and their status changes to Register Interest.
After some cutoff date, close registration and Export a list of the current interested people.
Curate the list and choose who will go on to the next step
Create a General Admisison ticket and ensure the previous Register Interest ticket is deactivated
Option1
Create a CSV of the approved attendees
Use Update->Mass Update Status from the Attendees screen to change the people in the CSV to the General Admission ticket (this will also set their status to Registered).
Optionally send them an email (either as part of the mass update, or using a schedule limited to ‘Status= registered’ afterwards) notifying them of their success.
Option 2
Set the event to Invite only
Manually cancel anyone whom you do not want to attend
Create a schedule limited to people with ‘Register Interest’ status and use it to send a second Invitation
People from the approved list can then register themselves
An event with a Waitlist, to allow people to still register after an event is sold out.
Create a General Admission ticket and set it to have a limited number of places. Optionally set it to auto-hide itself when not available.
Create a Waitlist ticket, optionally set the ticket’s description and name to reflect its purpose
Invite people in the usual way
People register to attend, initially the only ticket available is the General Admission People registering like this will have the Registered status, as normal.
Once the number of available places is reached, the Waitlist ticket will be shown
People registering using the Waitlist ticket will have their status set to Waitlist
If any registered people cancel, or more places are made available, you can choose people from the Waitlist status to update to a General Admission ticket.
Attendees Screen
The buttons on the Attendees screen have been adjusted – there is now Import, Update and Export.
Importing attendees and manually adding single attendees are now under the Import dropdown
Update has options for mass-updating multiple attendees’ details and registration status.
Print has now been moved to the Export dropdown.
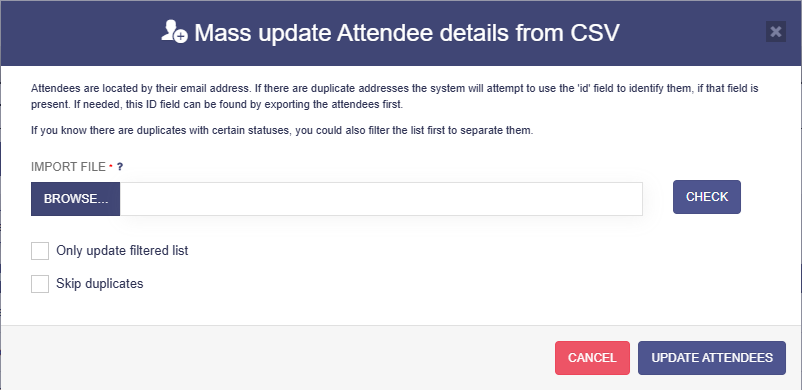
Mass-update Details
This allows the details of multiple attendees to be updated at once. It behaves similar to the Import Attendees window, but will only update existing people.
The email address is used to identify individuals – if you know you have duplicate email addresses in your data, the system can also use the ‘id’ field to identify individuals – you can find the ‘id’ of your attendees by first Exporting them, each attendee will have an ‘id’ which you can use in your CSV.
Once you’ve chosen a file, you can use the ‘check’ button to see if there are any issues before you go ahead.
If ‘Only update filtered list’ is checked, then the operation will only be performed on the current filtered list of attendees in the Attendees screen, anyone excluded by the filter will also be excluded from the update.
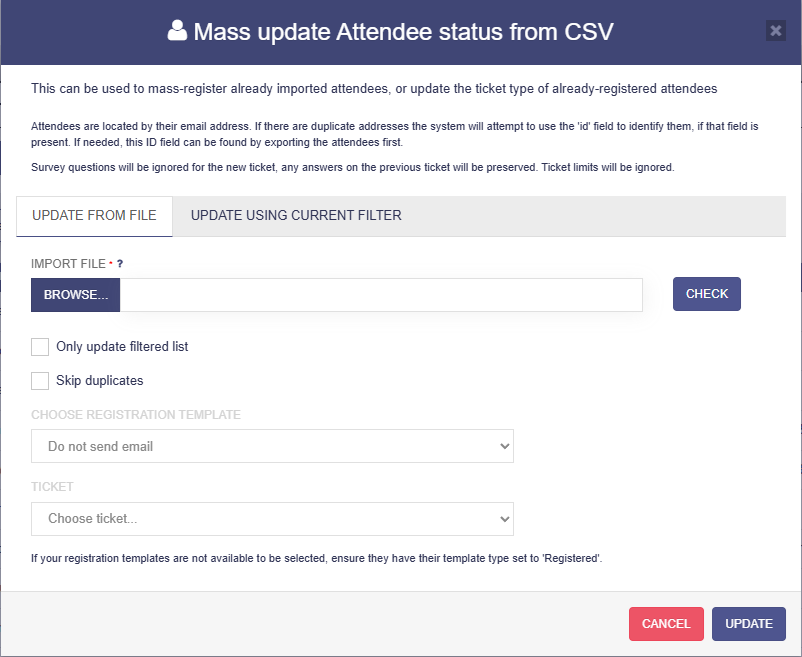
Mass-update Status
This allows the status of multiple Attendees to be updated, by changing their ticket type (and also registering them, if they have no ticket type). Update From File behaves the same was as the mass-update details screen above, with the addition of dropdowns to choose the new ticket type and optionally send an email as part of the same process.
Update Using Current Filter allows you to update everyone in the current filter options rather than use a CSV file. A summary of the statuses and ticket types contained in the current filter will be shown to make it easy to see what will be changed.